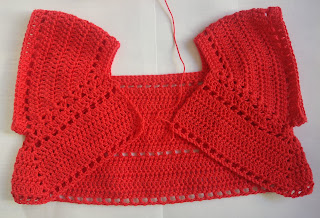
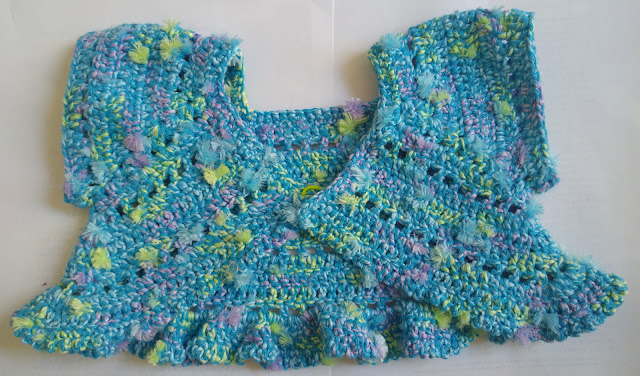
Butterfly Shrug for babies and girls
This
pattern is from Tejiendo Perú. The original pattern is in Spanish, but they
have given me permission to translate the pattern to English and post it on my
blog. My translation is written using US crochet terms.
You can
find the original Spanish pattern and photos here: Bolero mariposa
They also
have a YouTube video in Spanish here: YouTube Bolero mariposa
Materials Needed:
Thin cotton
yarn (recommended for use with 3mm hook).
3mm hook
(or hook needed to obtain the correct gauge).
4 stitch
markers (optional, but recommended for the starting chain).
Needle
Scissors
Button
Gauge:
18dc x 11Rows
à
10cm x 10cm.
Sizes:
Please remember
that the amount of yarn and ages are approximate.
Size
|
Colour
|
Approximate yarn
needed
|
Approximate age
|
Chest size
|
1
|
Orange
|
35 grams
|
3 to 6 months
|
44 cm
|
2
|
Green
|
40 gr
|
6 to 12 months
|
46 cm
|
3
|
Yellow
|
45 gr
|
1 to 2 years
|
50 cm
|
4
|
Pink
|
50 gr
|
2 to 4 years
|
56 cm
|
5
|
Blue
|
55 gr
|
4 to 6 years
|
60 cm
|
6
|
Purple
|
60 gr
|
6 to 8 years
|
66 cm
|
I am using
the same system and colours as the original pattern. Each size will always be
in the same colour throughout the pattern (Size 1, Size 2, etc).
Instructions:
Starting
chain:
Please see the chart below:
For this
pattern you can use a chainless start. If you do, please remember that you
start on Row 1 which has increases, so you will have more dcs than that
starting chain.
Size
|
Colour
|
Total number of chains
|
sleeves
|
back
|
edges
|
increases
|
1
|
Orange
|
41 =
|
11 x 2
|
+ 13
|
+ 2
|
+ 4
|
2
|
Green
|
47 =
|
13 x 2
|
+ 15
|
+ 2
|
+ 4
|
3
|
Yellow
|
53 =
|
15 x 2
|
+ 17
|
+ 2
|
+ 4
|
4
|
Pink
|
59 =
|
17 x 2
|
+ 19
|
+ 2
|
+ 4
|
5
|
Blue
|
65 =
|
19 x 2
|
+ 21
|
+ 2
|
+ 4
|
6
|
Purple
|
71 =
|
21 x 2
|
+ 23
|
+ 2
|
+ 4
|
As you make
the stating chain place the stitch markers in the increase chains:
Chain 1 for
the edge. Chain 1 for the increase and place marker. Chain 11 13 15 17 19 21 for the sleeve. Chain 1 for the increase
and place marker. Chain 13 15 17 19 21 23
for the back. Chain 1 for the increase and place marker. Chain 11 13 15 17 19 21 for the sleeve. Chain 1 for
the increase and place marker. Chain 1 for the edge.
Collar:
Increase stitch. For this part the increase is done with a double V: 2dc 1ch 2dc all in the same
stitch.
Row 1 (all
sizes): ch3 (counts as the edge dc). Make an increase in the chain with the
marker. Place 1 dc in each chain until the next marker (1 sleeve). Make an
increase in the chain with the marker. Place 1 dc in each chain until the next
marker (back). Make an increase in the chain with the marker. Place 1 dc in
each chain until the next marker (1 sleeve). Place 1 dc in the last chain (the edge).
Turn.
Row 2 (all
sizes): ch3 (counts as the edge dc), Skip 2 dc, make an increase in the ch
space, *Ch1, skip 1 stitch, dc in the next stitch. Repeat from * until 1 stitch
before ch space (sleeve). Ch1, make an increase in the ch space, *Ch1, skip 1
stitch, dc in the next stitch. Repeat from * until 1 stitch before ch space
(back). Ch1, make an increase in the ch space, *Ch1, skip 1 stitch, dc in the
next stitch. Repeat from * until 1 stitch before ch space (sleeve). Ch1, make an
increase in the ch space, skip 2 dc, dc into the edge dc. Turn.
Row 3 (all
sizes): ch3 (counts as edge dc), skip 2 dc, make an increase in each increase
and dc in each stitch. After the last increase skip 2 dc and dc into the edge
dc.
Row 4 to 6
(Size 1
and Size 2): Repeat Row 3.
Row 4 to 7
(Size 3): Repeat Row 3.
Row 4 to 8
(Size 4):
Repeat Row 3.
Row 4 to 9
(Size 5
and Size 6):
Repeat Row 3.
Cut yarn
after last row.
Joining the armholes:
 |
| 1st Sleeve |
After the
slip stitch go straight to the sleeve (without cutting the yarn).
Sleeves:
Round 1: ch3
(counts as 1 dc), *ch1, skip 1, dc. *Repeat all the way around. Going INTO the chains
under the arm NOT around the space. Ch1 and slip stitch to top of starting
chain.
Round 2:
Ch3 (counts as 1 dc), dc into each stitch all the way around. Cut yarn and
join.
Main body:
Increase stitch. For this part the increase is done with a simple V: 1dc 1ch 1dc all in the same
stitch
This part
goes from the starting chain, down the side of the edge stitches, along the
back and back up the side the other edge stitches to the other end of the
starting chain.
For the edges
place 1 dc into the join of the rows and 1 around the side of the dc.
Over the increase
place 1 dc in each dc and 1 dc into the chain space.
 |
| Underarms |
Over the back:
1 dc into each dc.
You will
have 3 sections. 2 fronts and 1 back. Each divide by a chain space. Both fronts
should have an EVEN number of stitches and the same on each side. The back
should have an ODD number of stitches.
Row 2 (all sizes):
Repeat “dc, ch1, skip 1” all the way
around. In the previous 2 increases place another increase, with a ch1 on each
side.
Row 3 (all sizes):
dc all the way around. Placing an increase
in the previous increase.
Row 4 (Size 2): Repeat Row 3.
Row 4 and 5
(Size 3): Repeat Row 3.
Row 4 to 6
(Size 4): Repeat Row 3.
Row 4 to 7
(Size 5): Repeat Row 3.
Row 4 to 8
(Size 6): Repeat Row 3.
Last Row
(all sizes): Repeat “dc, ch1, skip 1” all the way around. In the previous 2 increases
place another increase.
Border:
The border
is the same for all sizes. Rows 1, 2 and 5 go over the last edge of the body.
And Rows 3 and 4 go around the neck (into the other side of the starting chain)
 |
| Row 1 and 2 |
Row 2: ch3 (counts
as 1 dc), 1 dc into each stitch to the end.
(DO NOT TURN)
Row 3
(round the neck): ch 1, Working up the side of the body place 1 sc into the
join of each row and 1 sc around the side of each dc. When you get to starting
chain 1 sc into each chain. Work down the other side the same as the first. Stopping
when you get to the top of the last row. (turn)
Row 4
(round the neck): ch1, sc all the way to the start of row 3. (DO NOT TURN)
Please read
button info BEFORE row 5.
Button:
Sew your
button to the sc edge. The button hole is the 1st picot (chain
space) from row 5.
If you already
have a button to use, check its size before you do Row 5 of the border. If the
ch3 space is to small (or big) just make the 1st chain longer (or
shorter).
This pattern is from Tejiendo Perú. The original pattern is in Spanish, but they have given me permission to translate the pattern to English and post it on my blog. My translation is written using US crochet terms.
You can find the original Spanish pattern and photos here: Bolero mariposa
They also have a YouTube video in Spanish here: YouTube Bolero mariposa


Thank you soooo much! I had found the original translation and simply could not get it. Your instructions are wonderful and clear, and I can not wait to begin! Thanks ever so much! Z
ReplyDeleteI have been looking for this pattern for so long. Thank you so much. Can't wait to begin.
ReplyDeleteThank you for the translation, This is perfect!
ReplyDeleteThank You for this pattern. I've been trying to find the translation for FOREVER.
ReplyDeleteThank you for the translation, I am crocheting this pretty bolero at the moment by following the Spanish video with sound muted. It is working out but it is refreshing to have a proper English translation as reassurance. I am very grateful.
ReplyDeletewould you be able to tell how I can increase the size to fit my 12year old? Thank you.
ReplyDelete